RSS feeds can be a great tool for curating and sharing content from a range of different sources relevant to your business or WordPress website, but only if you use them effectively.
Ensuring that all of your aggregated content remains relevant and high-quality can be challenging. Having to sift through multiple RSS feeds to find the right content for your audience is time-consuming, though. If you need to sort through dozens or hundreds of articles every day manually, using feeds can quickly become a chore.
If you’re using the right WordPress RSS feed plugin, you’ll be able to automate that process. With WP RSS Aggregator, you can easily set up filters that will tell the plugin what content to share on your website and which it should ignore.
In this article, we’ll talk a bit more about why you need to manage and curate RSS feeds. We’ll also talk about how WP RSS Aggregator uses filters to automatically manage RSS feeds and show you how that process works, step by step.
Let’s get started!
Understanding and managing RSS feeds
Before we get into the details of how to manage RSS feeds, we need to answer a basic question: What exactly are RSS feeds? We’ve covered this in detail in our dedicated beginners’ guide, but in a nutshell, a Really Simple Syndication (RSS) feed is a list of updates from a website or blog that you can subscribe to using an RSS reader.
This is what the Aggregator blog RSS feed looks like:
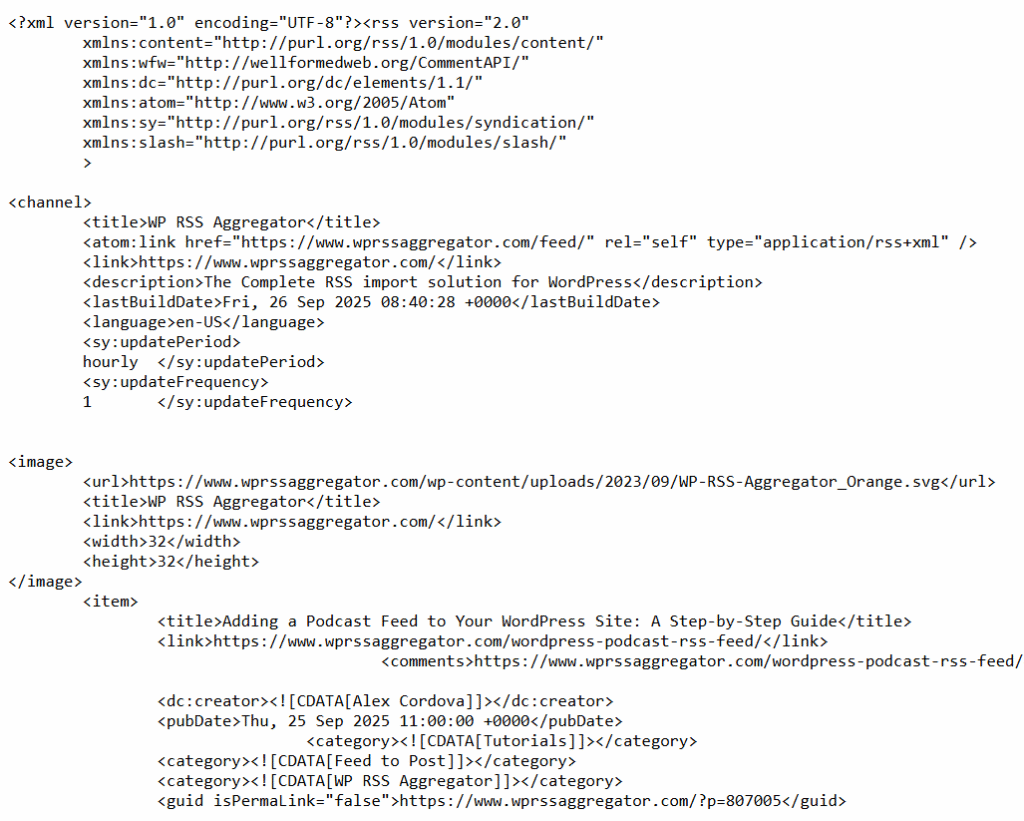
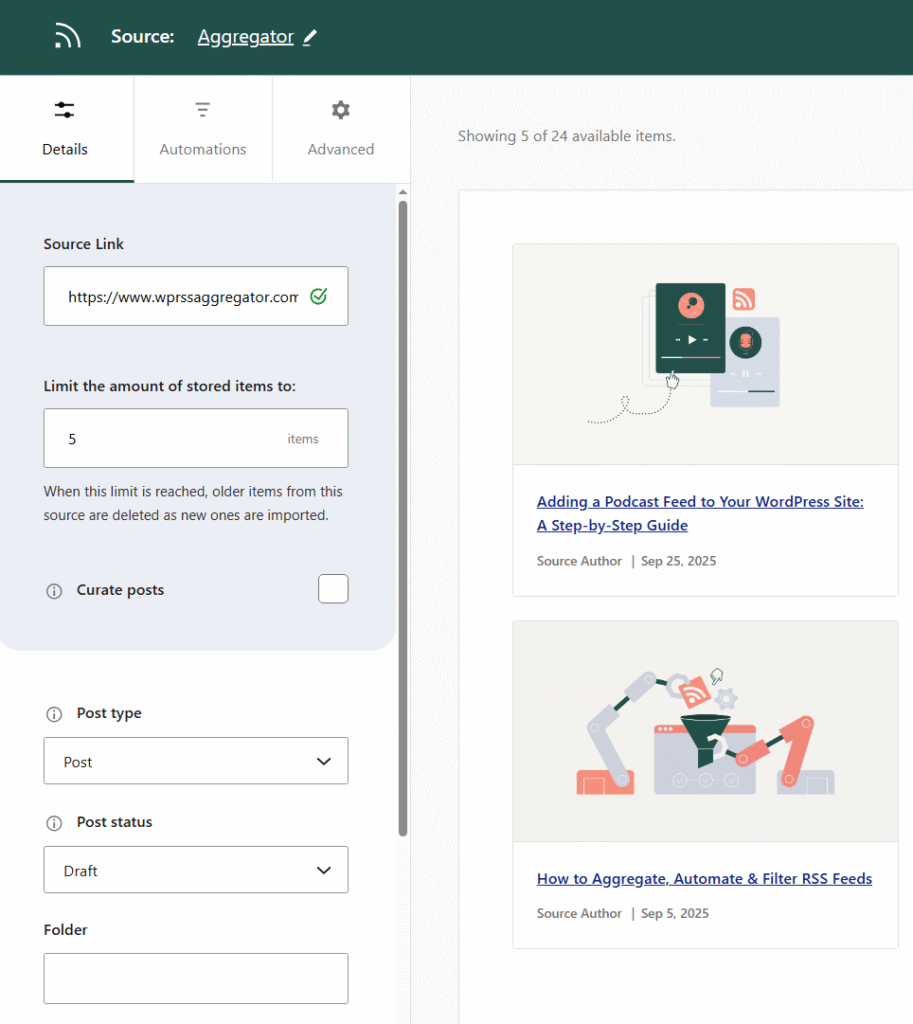
An RSS feed reader or plugin can take a feed in that format and turn it into something that looks like this. Here, we have a preview of an RSS feed, translated by WP RSS Aggregator from XML (that code you see in the previous screenshot) into a great visual you can include on your website:
If you want to keep up with updates from multiple RSS feeds, things can get hard to manage fast. The amount of new publications you need to go through can be a lot, and that’s where filters and automations come in.
Whether you employ RSS feeds to curate content for your own use or intend to publish and share curated content with an audience, filtering RSS feeds is an essential step toward better content management. Otherwise, neither you nor your audience will get the content you all want.
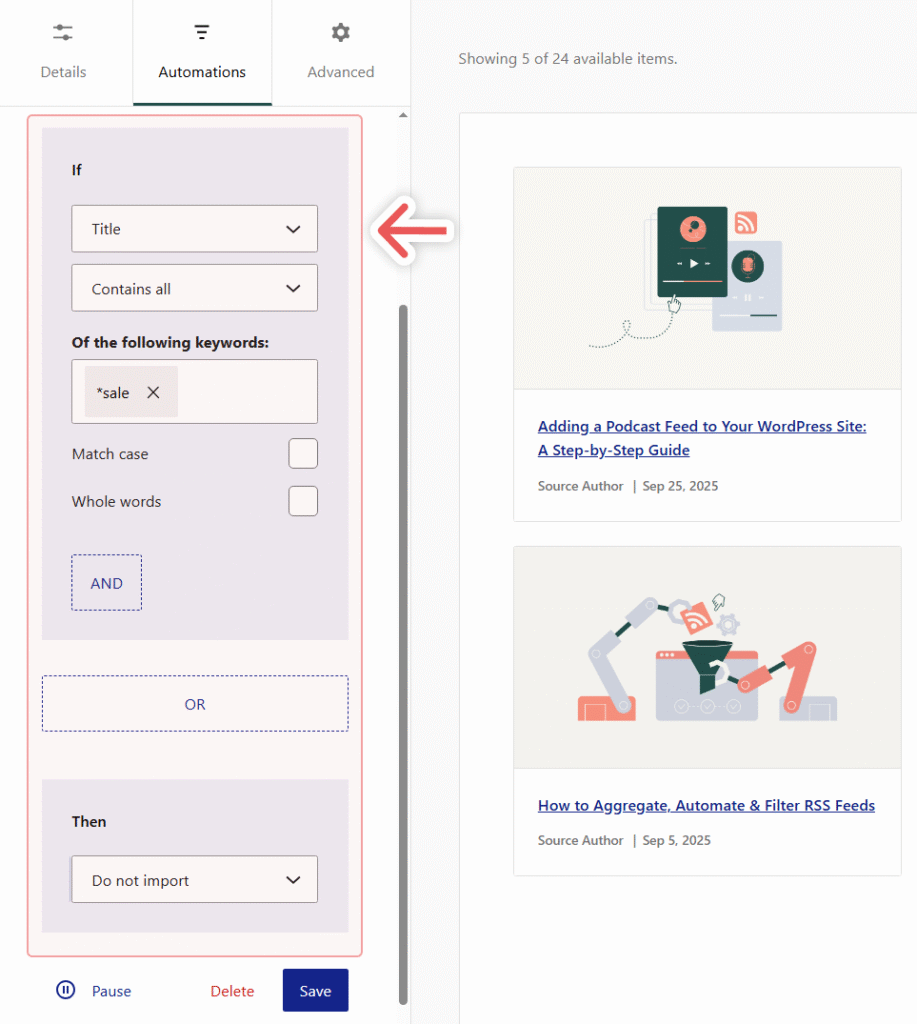
The concept of RSS filters is fairly straightforward: you tell your RSS reader or plugin what kind of content to ignore or focus on. For example, you can tell WP RSS Aggregator not to import content from an RSS feed if the title includes the word “sale”:
We’ll go over how to get to that point using WP RSS Aggregator in a minute. For now, let’s break down why filters are so useful and how they make RSS feeds better:
- They help you weed out irrelevant or duplicate content
- You can use filters to fully personalize each feed and tailor it to a specific audience
- You can use filters to automate content publishing
- They help you spend less or no time manually approving the content you see
- Stopping potentially harmful (to the user or your reputation) content from being seen
The type of filters you can set up will depend on what RSS feed tool you use. With an RSS reader, you’ll typically be able to filter content by category or keywords.
Now that you know why filtering RSS feeds is so important, let’s go over how they work in WP RSS Aggregator and how to set them up.
WP RSS Aggregator enables you to add RSS feeds as sources and filter what content to import using keywords, like in the screenshot you saw a minute ago. The plugin also lets you set up filters for feed displays and at a global level.
Keyword filtering is not available in the free version of WP RSS Aggregator. If you plan on adding multiple sources that publish content regularly, we recommend that you opt for a premium license. A Basic premium license will enable you to set up keyword filters, enabling you to automate content curation.
Once you install WP RSS Aggregator and activate your license, you can start adding sources. Here’s how that works.
To add your first RSS feed source, you’ll first need to find the feed source URL. There are a few ways to do this:
- For many websites, the feed URL will simply be the website URL followed by /feed.
- Use a Chrome extension like Get RSS Feed URL to access feed sources.
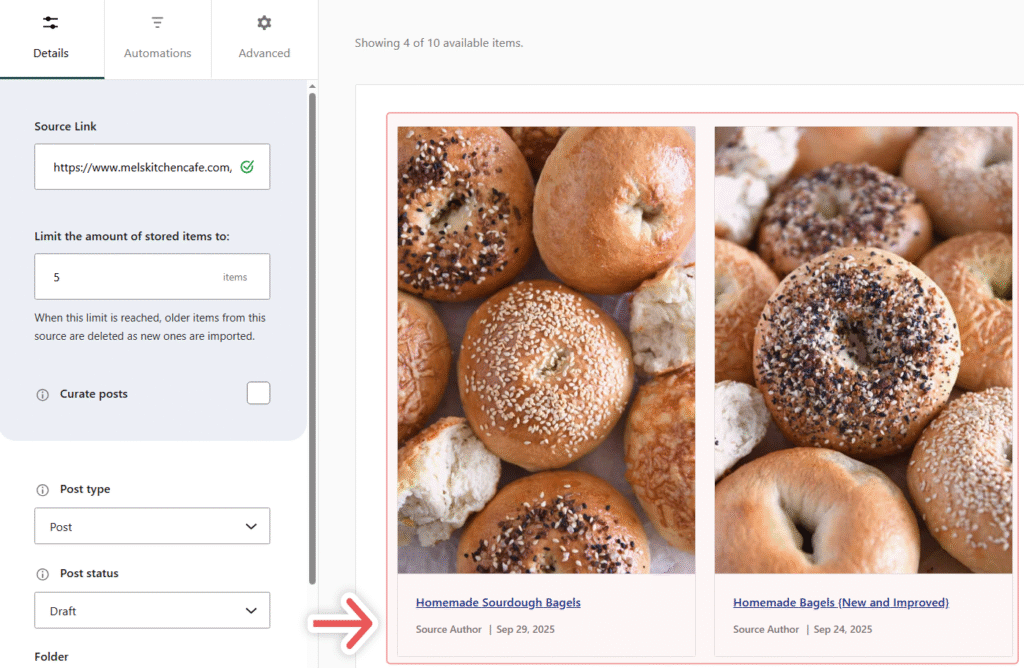
Once you have the feed URL ready, go to Aggregator > Hub and click on Add a new source. On the next screen, add the RSS feed URL in the field under Source Link.
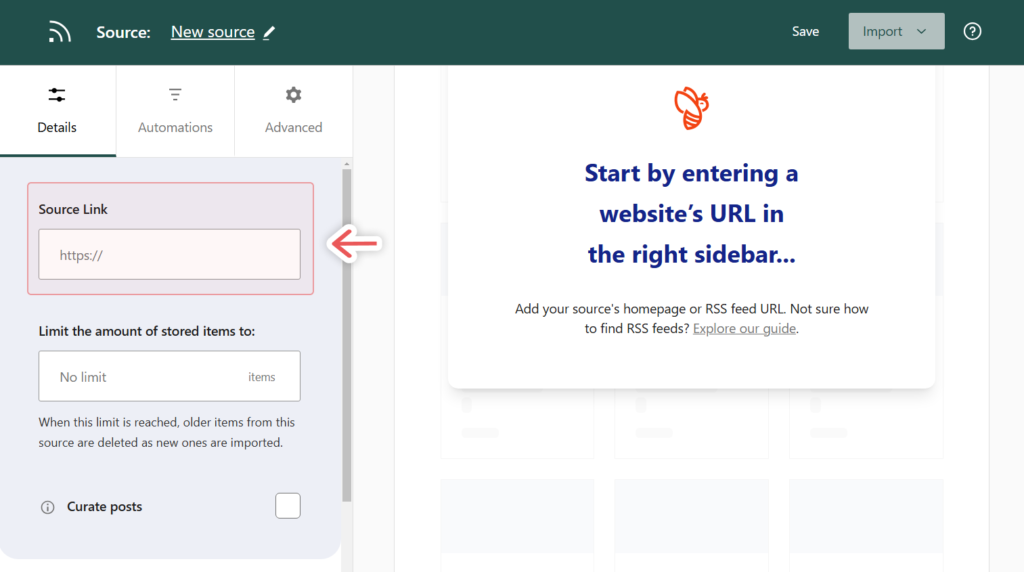
If the feed URL is correct, WP RSS Aggregator will load a preview of the feed to the right side of the screen:
Those are the very basics of setting up a source in WP RSS Aggregator. If you want to go over additional settings for new sources, check out our documentation on how to add and configure sources.
WP RSS Aggregator also lets you return to modify the source settings at any point. For now, save the source and click on its Automation tab to go over filters.
Step 2: Add keyword and tag filtering to specific feed sources
WP RSS Aggregator lets you set up filters at multiple levels. When you set up a source, you can configure filters that apply specifically to it by navigating to the Automations tab.
The plugin’s filter system works using if/and/or rules. For example, if you don’t want to see any bagel recipes in your feed, you can set up a rule that says “If the title contains any of the following keywords: bagel, then do not import that post”:
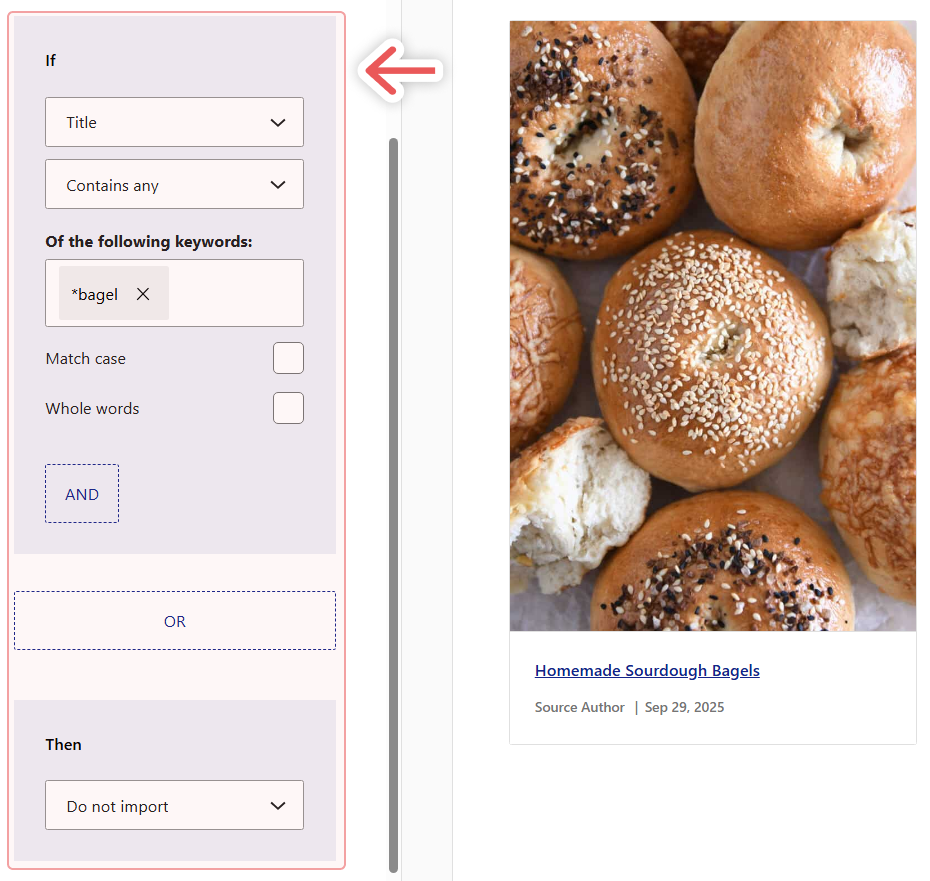
As soon as we save that rule, that bagel post to the right will get filtered out automatically. Every time the plugin checks if the feed has new content to import, it’ll also check any active filters you have to make sure it only gets what you want.
Any source can have multiple automations, and the rules can be as simple or as complex as you want. You can configure WP RSS Aggregator to look for keywords in titles, the body of the content, and in taxonomies.
When setting up a new source with WP RSS Aggregator, take some time to think about what content you want to import or avoid importing from it. The plugin makes it easy to set up as many automations as you need, but what rules to set are up to you.
Step 3: Set up global keyword filter automations
WP RSS Aggregator lets you set up filters at a global level, which comes in handy if there are automations that you want to apply throughout your website.
Whenever possible, we recommend setting up filter automations at a source or display level. This gives you a lot of control over what content is imported to your site and what you show to users. However, if you need to bring out the big guns, here’s how to set up global automations.
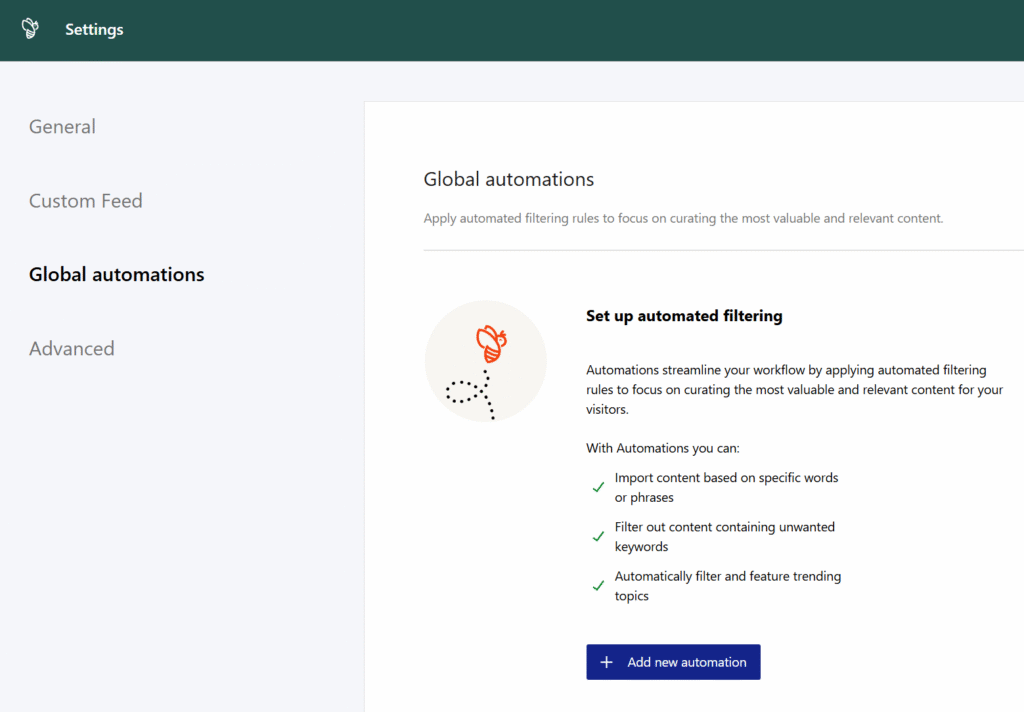
Go to Aggregator > Settings > Global automations. If this is your first time setting up global automations, click on Add new automation:
From here on, the process works just the same as adding automated filters to feed sources. You can use the WP RSS Aggregator automation builder to configure what filters you want to apply at a site level:
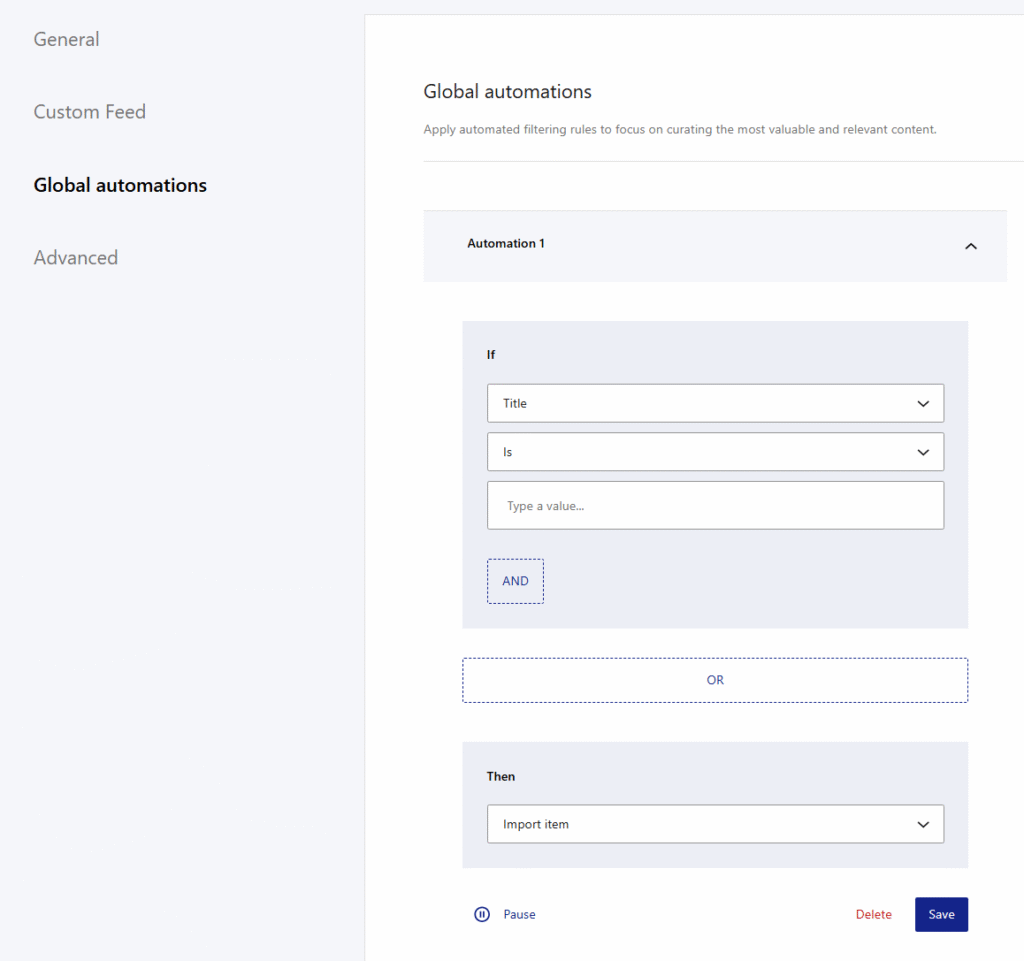
When you’re done, click on Save and that’s it! The automation will apply throughout your website until you pause or delete it.
For more information on how to customize your RSS source feeds with WP RSS Aggregator, check out our complete guide on WordPress RSS feed setup.
If you’re currently using RSS feeds or want to start harnessing the power of content curation on your WordPress website, the benefits of RSS feed filtering are clear. They streamline the content management and consumption processes to support publishers while, crucially, providing a better experience for the end user.
The advantages of using WP RSS Aggregator for keyword filtering are plentiful. Positive results include improved content relevance, added quality, easier management of large content volumes, and the ability to keep your news feeds flowing at all times. When combined with the ability to control the design for a better reader experience, it’s no wonder that over 60,000 people choose WP RSS Aggregator to curate and aggregate content.
If you want to take your content curation and RSS feed management to the next level, try WP RSS Aggregator today. The future of your WordPress website’s content strategy has never looked better!